571
DIY wash&cure для фотополимерника
Приобрел себе недавно фотополимерный принтер (Anycubic photon mono x 6ks). Как известно, данный тип устройств нуждается еще в куче дополнительного оборудования - все вот эти промывания изделий в спирте, засветка деталей для полной полимеризации - довольно значимые минусы технологии в домашних условиях. Однако качество моделей и возможности печати того стоят.
Итак, что нам нужно:
- промывка в спирте модели сразу после печати;
- желательно чтобы помещался весь стол без отделения модели и на всю высоту;
- желательно обеспечить какое-нибудь шевеление жидкости в емкости для лучшего эффекта, в идеале - интенсивное шевеление;
- некое устройство для засветки модели.
Есть всякого рода готовые варианты - самый популярный, пожалуй, wash & cure - но стоит для таких целей он как половина принтера (10к), что я посчитал неприемлемым для своего любительского варианта использования.
Самое бюджетное для засветки - УФ фонарик, им я и пользовался какое-то время, но съедает батарейки очень быстро, хоть и эффективен.
Вариант с подоконником и солнечными лучами такой себе как по времени (у меня обычно выходит всем этим заниматься в темное время суток) так и по степени контроля - некоторые типы пластиков можно и пересветить (например, прозрачный довольно сильно желтит, хотя через несколько дней это проходит).
Собственно, пойдем по порядку и пути использования доступных девайсов и материалов.
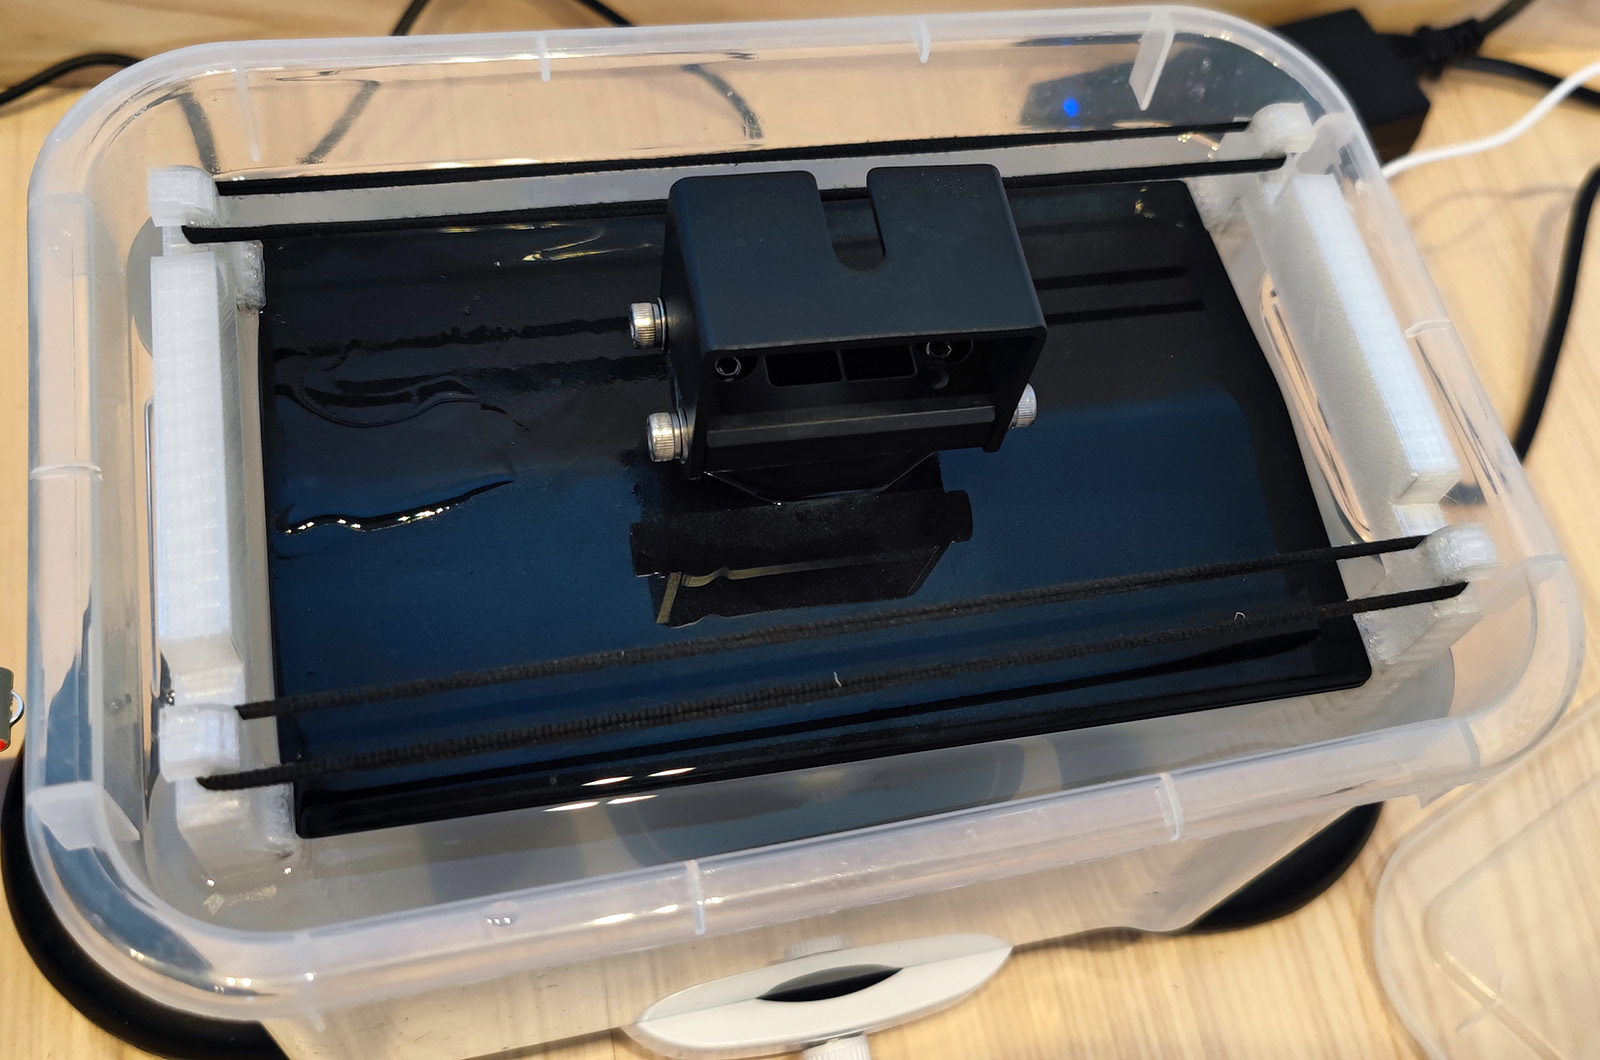
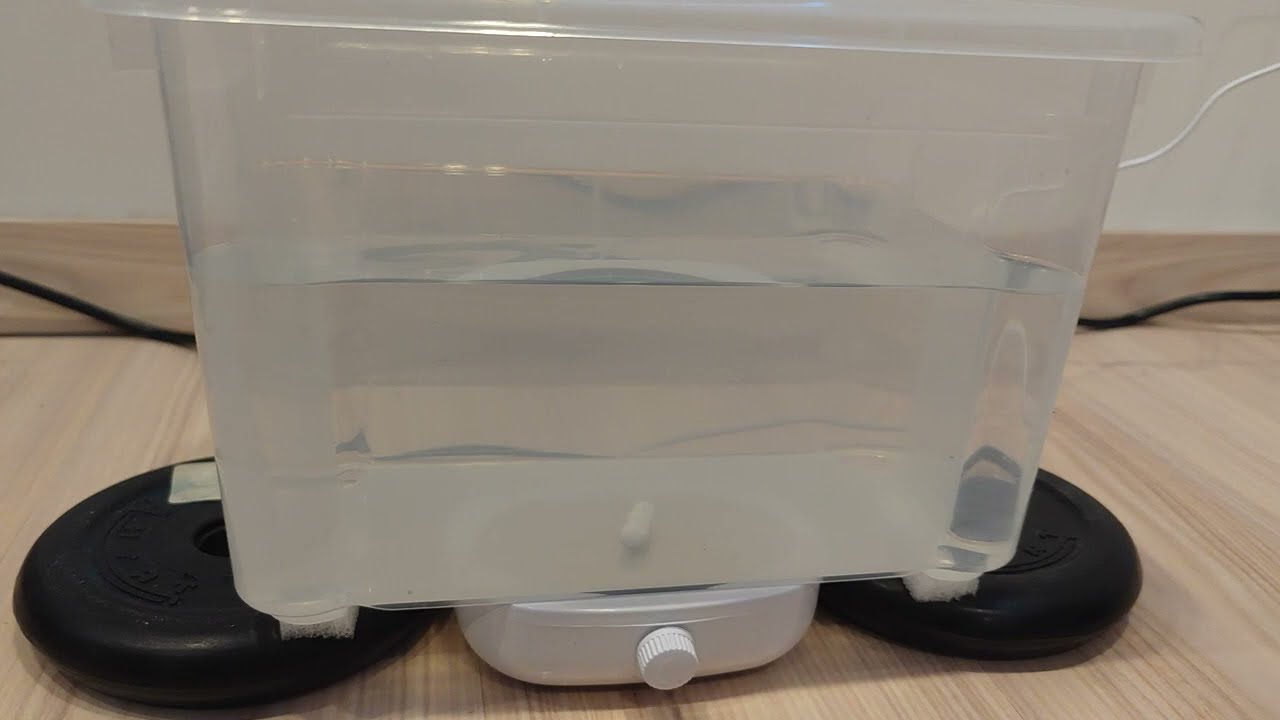
Промывочная станция
Нам понадобится:
- Ящик Кристалл 27.3x19x17 см 5.5 л пластик с крышкой - 160 рублей (идеально подошел вообще под мой стол);
- магнитная мешалка (такие обычно используют всякие химики) - 1400 рублей (вот тут интенсивность мала, но альтернатив нет);
- ну и допечатываем на обычном принтере пару держателей для фиксации стола на разной глубине (чтобы детали были поближе к мешалке).
Собираем это все в кучу и получаем девайс.
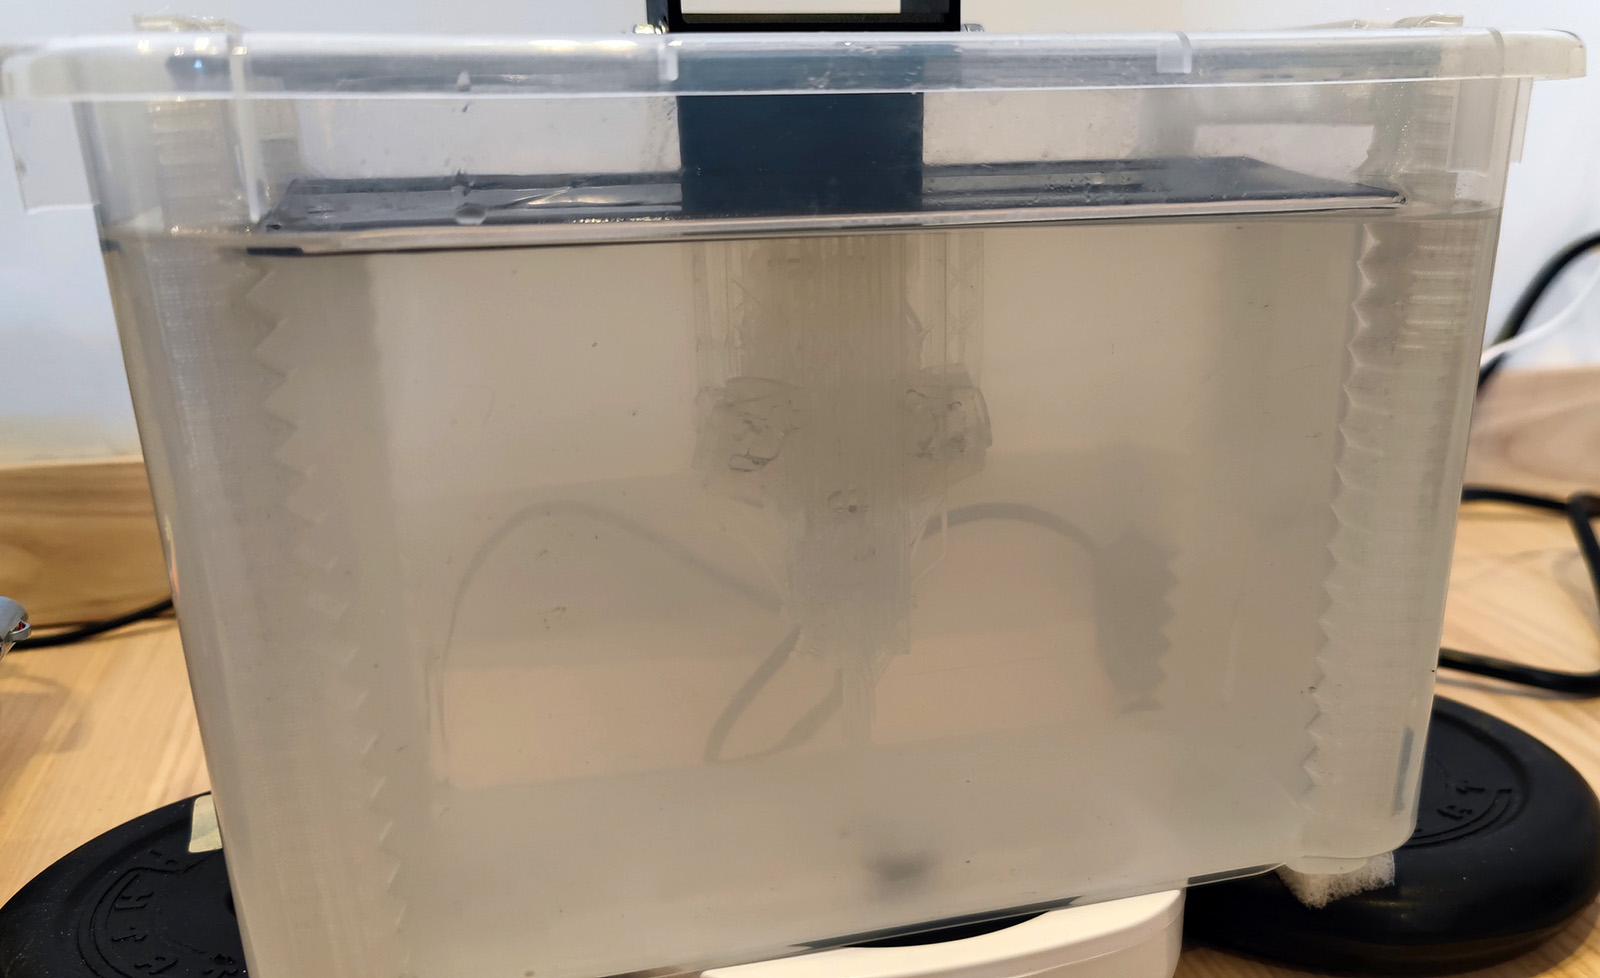
Нельзя просто так взять и не разлить спирт, наливая его из канистры.

Стол фиксируется на любой глубине, достаточно удобно.
Ну и демонстрация эффективности перемешивания этой мешалкой такого объема спирта (видео):
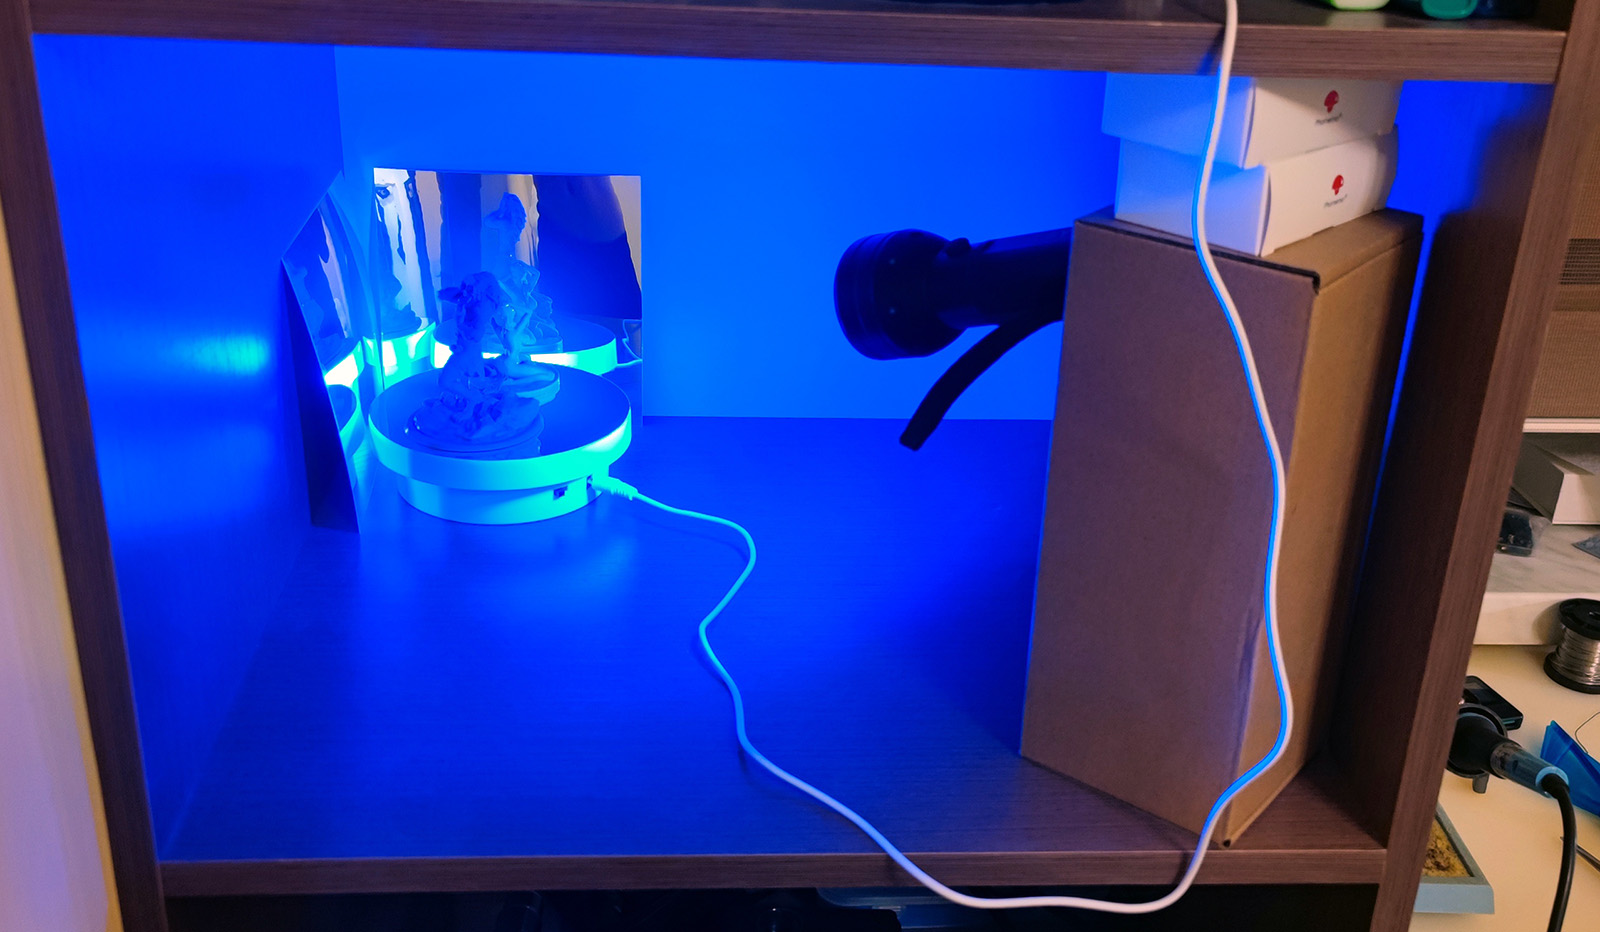
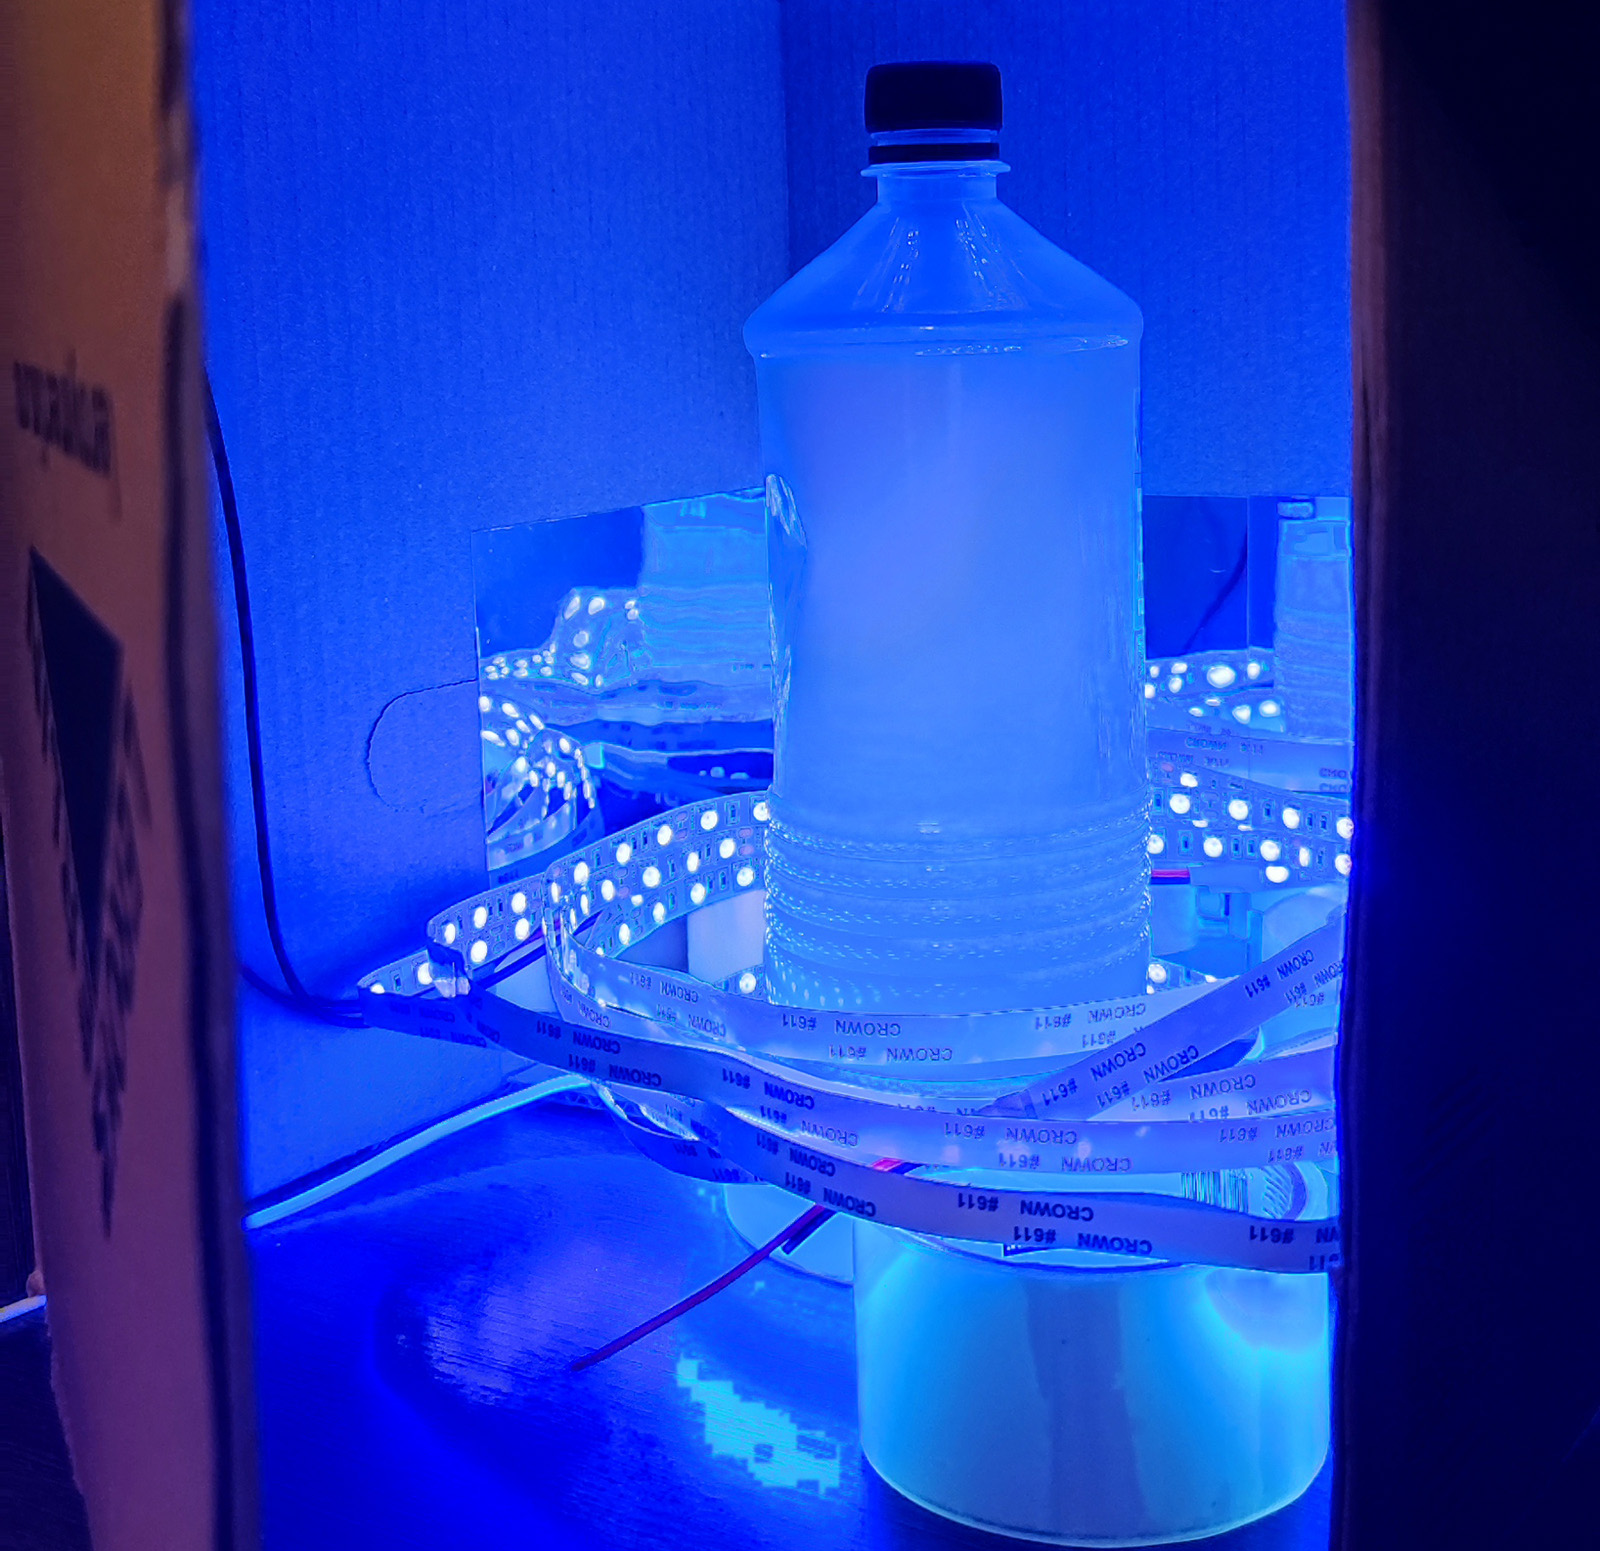
Станция засветки
Нам понадобятся:
- короб из леруа высотой и шириной в 30см, по сути нам нужно собрать куб 30х30х30 68 рублей;
- 25 самоклеющихся зеркальных плиток 15х15см (повышают эффективность и эстетику, но не обязательны) - 1200 рублей;
- крутящийся столик (были мысли напечатать/собрать самому, но стоит копейки) - 750 рублей;
- светодиодная УФ-лента 5м (по факту это даже больше чем нужно) - 3000 рублей;
- блок питания для светодиодной ленты 12V, 100W - 500 рублей;
- реле времени, чтобы можно было накрутить время работы и не следить за процессом - 500 рублей, взял самое простейшее.
Для начала проверяем УФ ленту, т.к. нанометры указаны не были, неизвестно подошла ли бы она к смоле:
Засвечивать спирт кстати было ужасной идеей, стало только хуже.
Собираем коробку и оклеиваем плиткой:
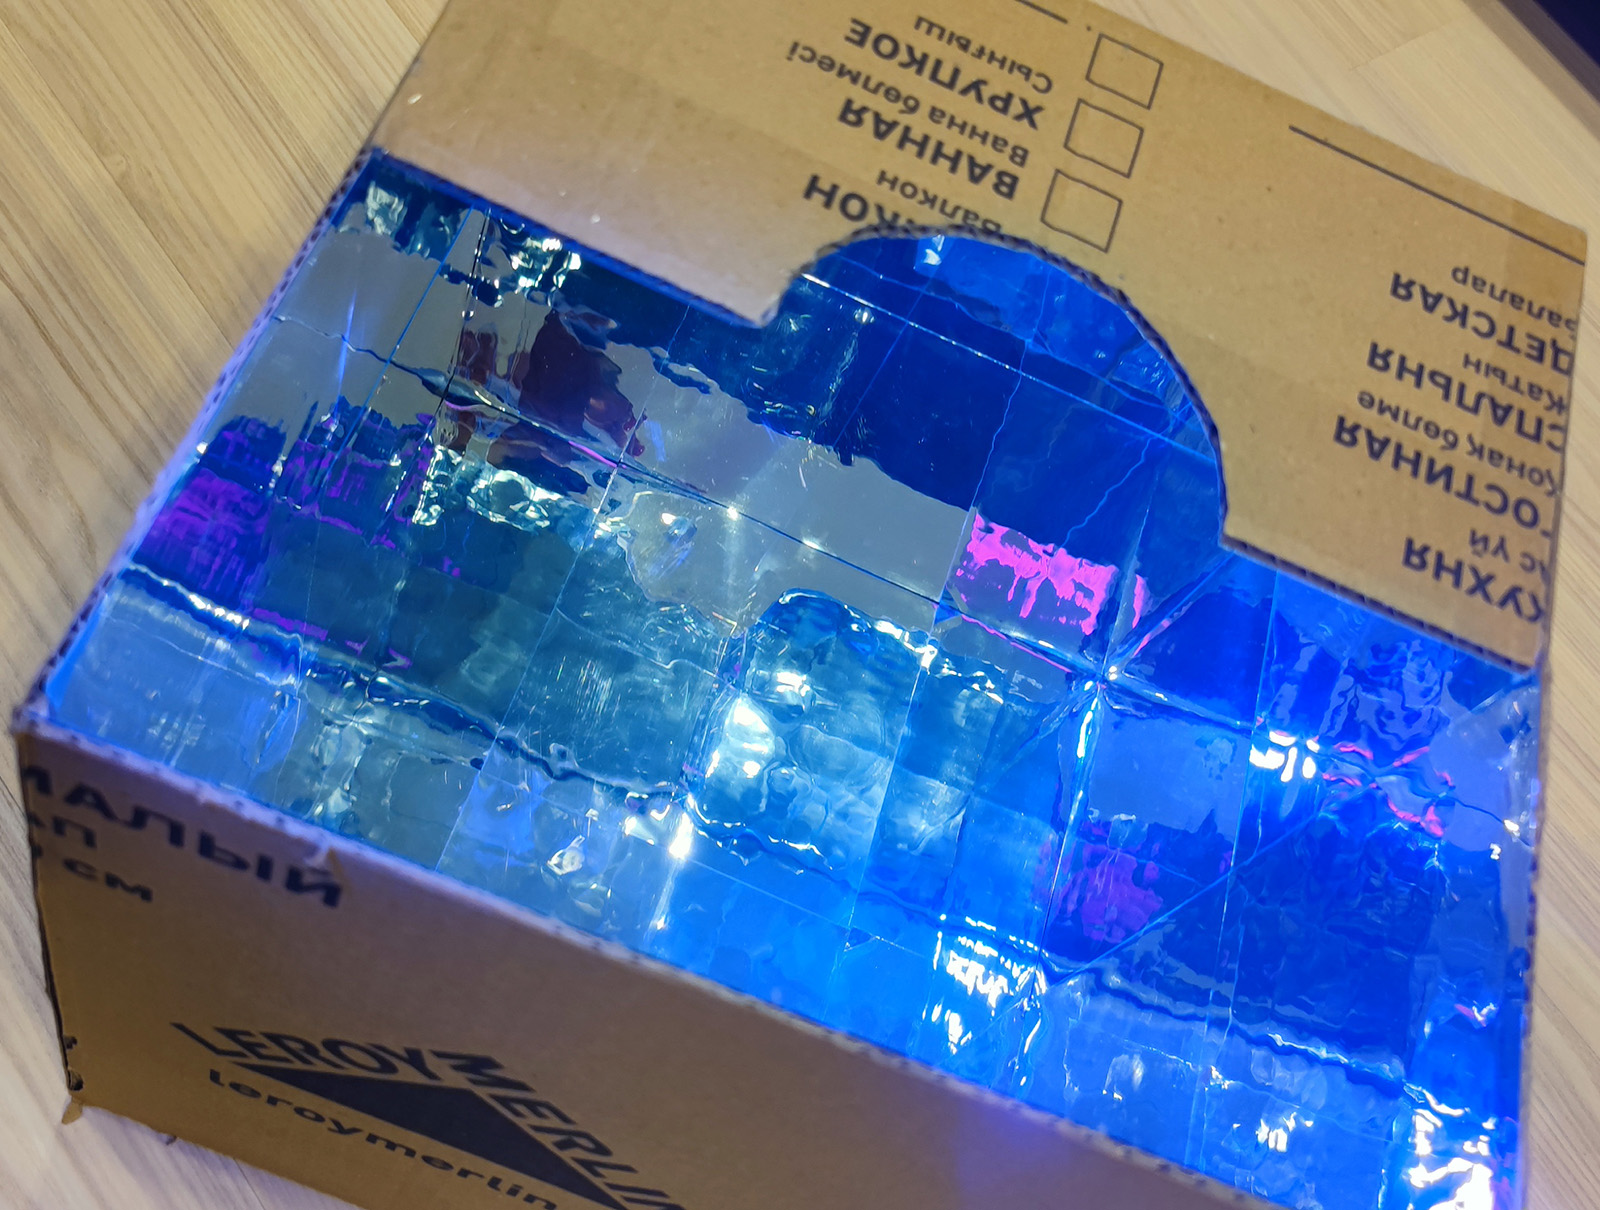
Коробка по высоте идеально вписалась в мой стеллаж, а справа организовалось удобное место под полимеры.
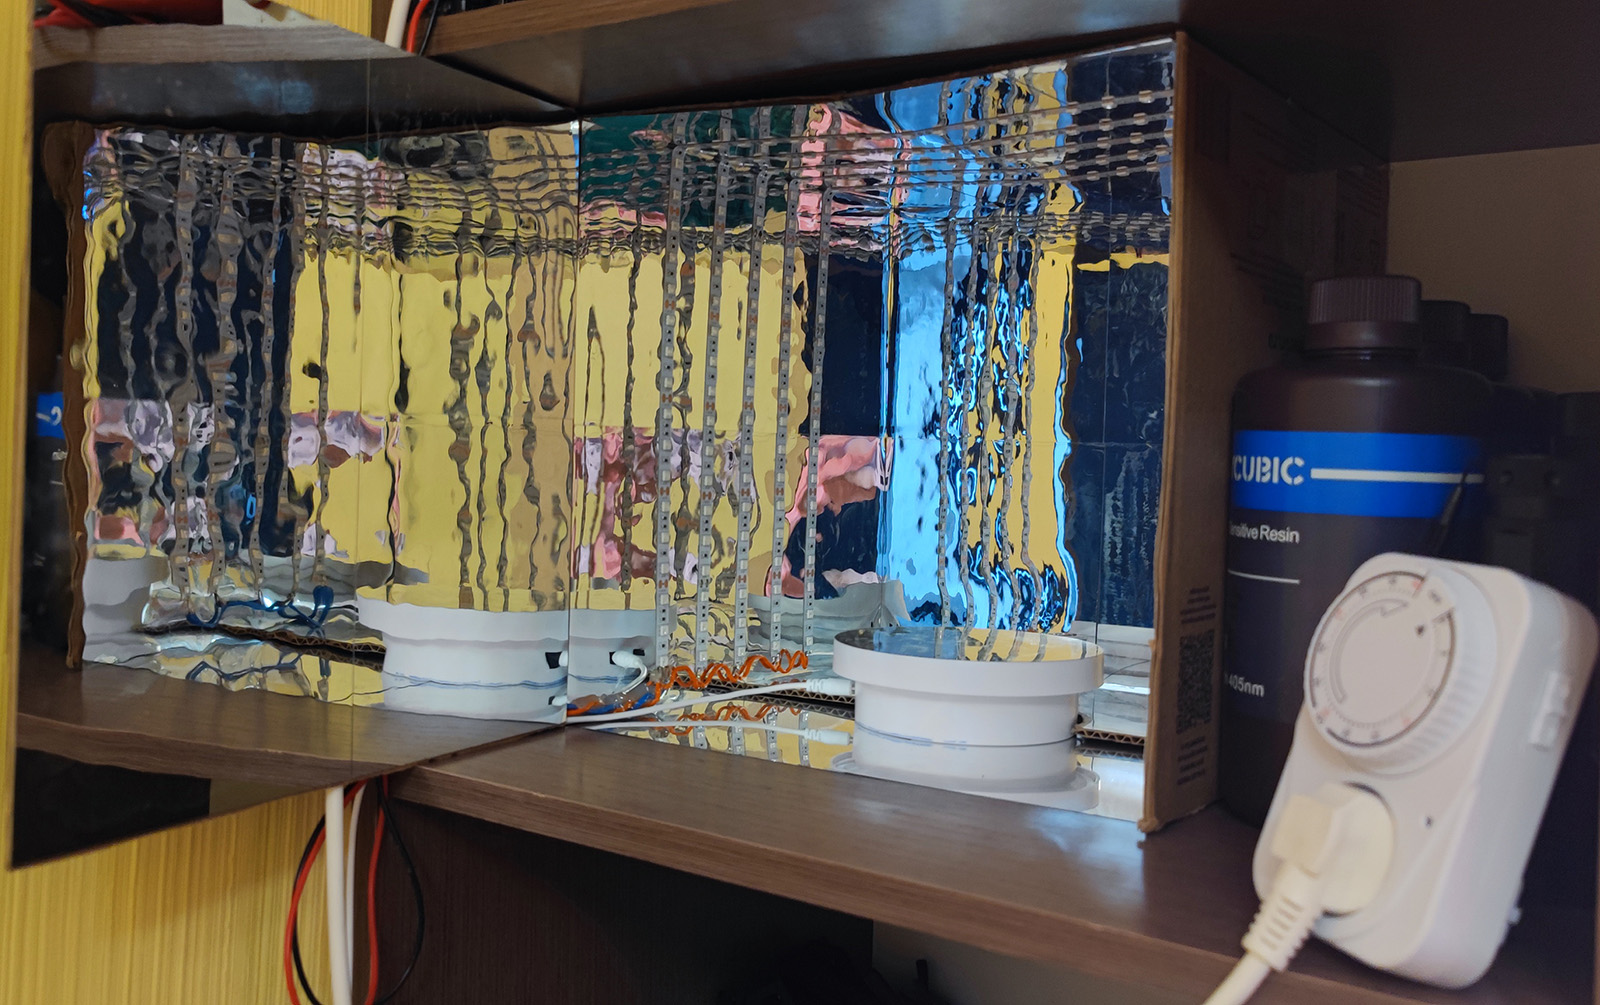
Ленту наклеил в центре коробки 5 линиями по 3 сторонам, как раз ушла почти вся купленная лента. Уточка в солярии:

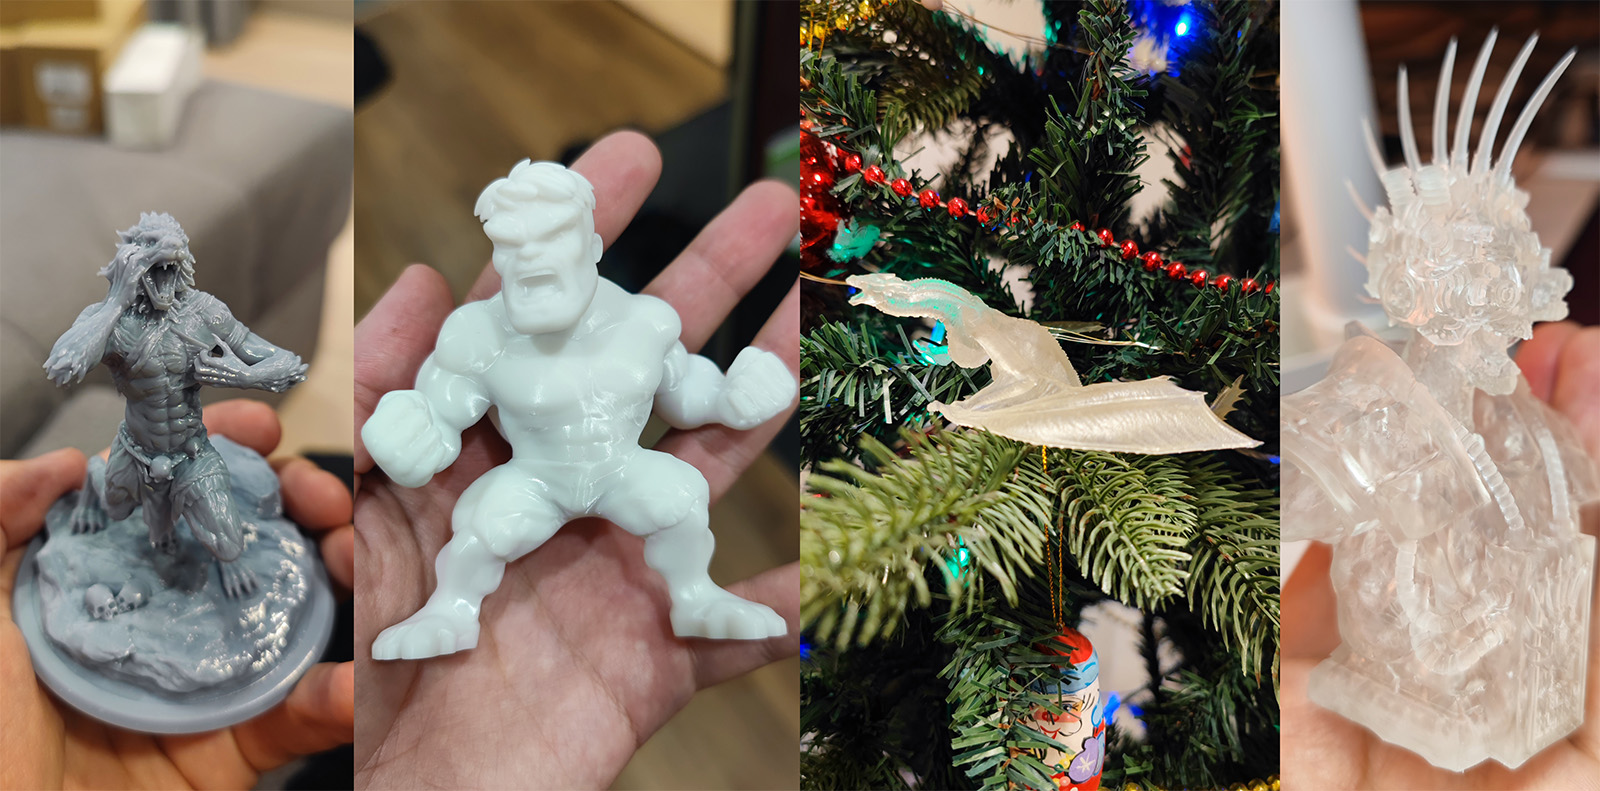
В качестве некоего саммари могу сказать что технология огонь, в наши времена уже очень доступна. Себестоимость печати не сильно выше чем у fdm-принтеров (в ~2 раза смола стоит дороже чем пластик в расчете на грамм), но качество и скорость (особенно на больших партиях деталей) - прям супер. Есть свои нюансы, но вот эта паутина от ретрактов, шлифовка деталей и прочее - уходит в историю, деталь сразу после печати можно даже красить (в идеале с предварительным грунтом, но это уже для супер эстетов).
Такие вот первые результаты печати:
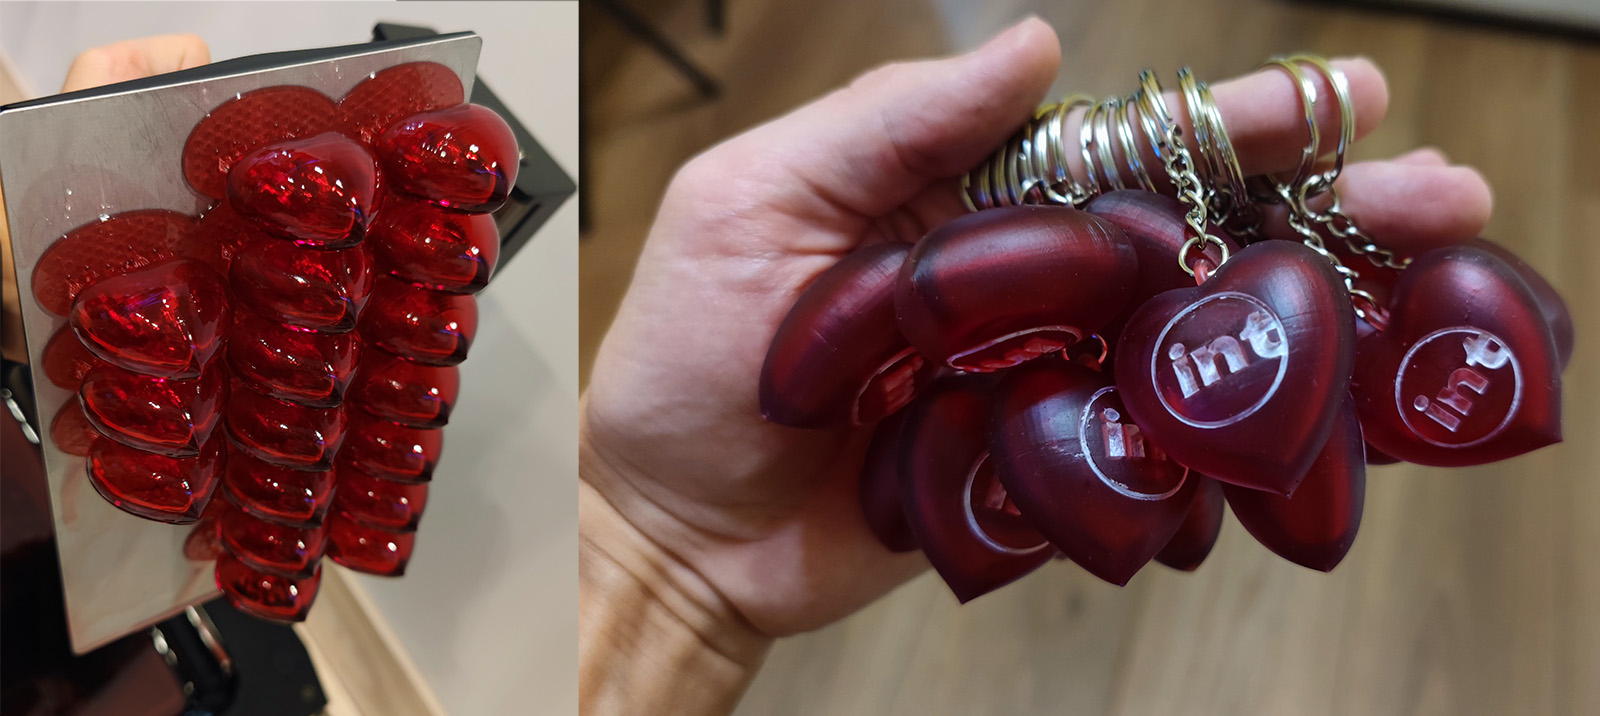
Ну и один из первых практических опытов - брелки на 8 марта с символикой компании:
Несмотря на наличие FDM принтера (даже двух) - приобретением остался крайне доволен, очень многие вещи, которые раньше печатал на FDM переехали на SLA ввиду недостижимой точности и часто даже скорости. Возня со смолой и химией после печати не так плоха, как по мне не хуже чем постобработка деталей после FDM печати.
Комментариев пока нет
-

Продолжаем печать после отключения
Печать идет больше суток и в процессе пропадает свет. Знакомо? -

Как я работу в 2026 году менял + бонус
После 10 лет в e-commerce я вышел на рынок -

Goback - простые бэкапы
Решил тут наконец заняться бэкапами. И без самописных утилит не обошлось. -

Проект Наблюдатель
Проект приурочен к хеллоуину - это статуя одноглазого ктулху с механизированным… -

Универсальный AI Telegram Bot
Хотите в пару действий запустить собственного AI бота для Telegram? -

Анализ истории просмотров Youtube
Задумывались, сколько времени вы проводите за просмотром видео? Давайте считать.