139
DIY Honda: Печатаем детали в гараже
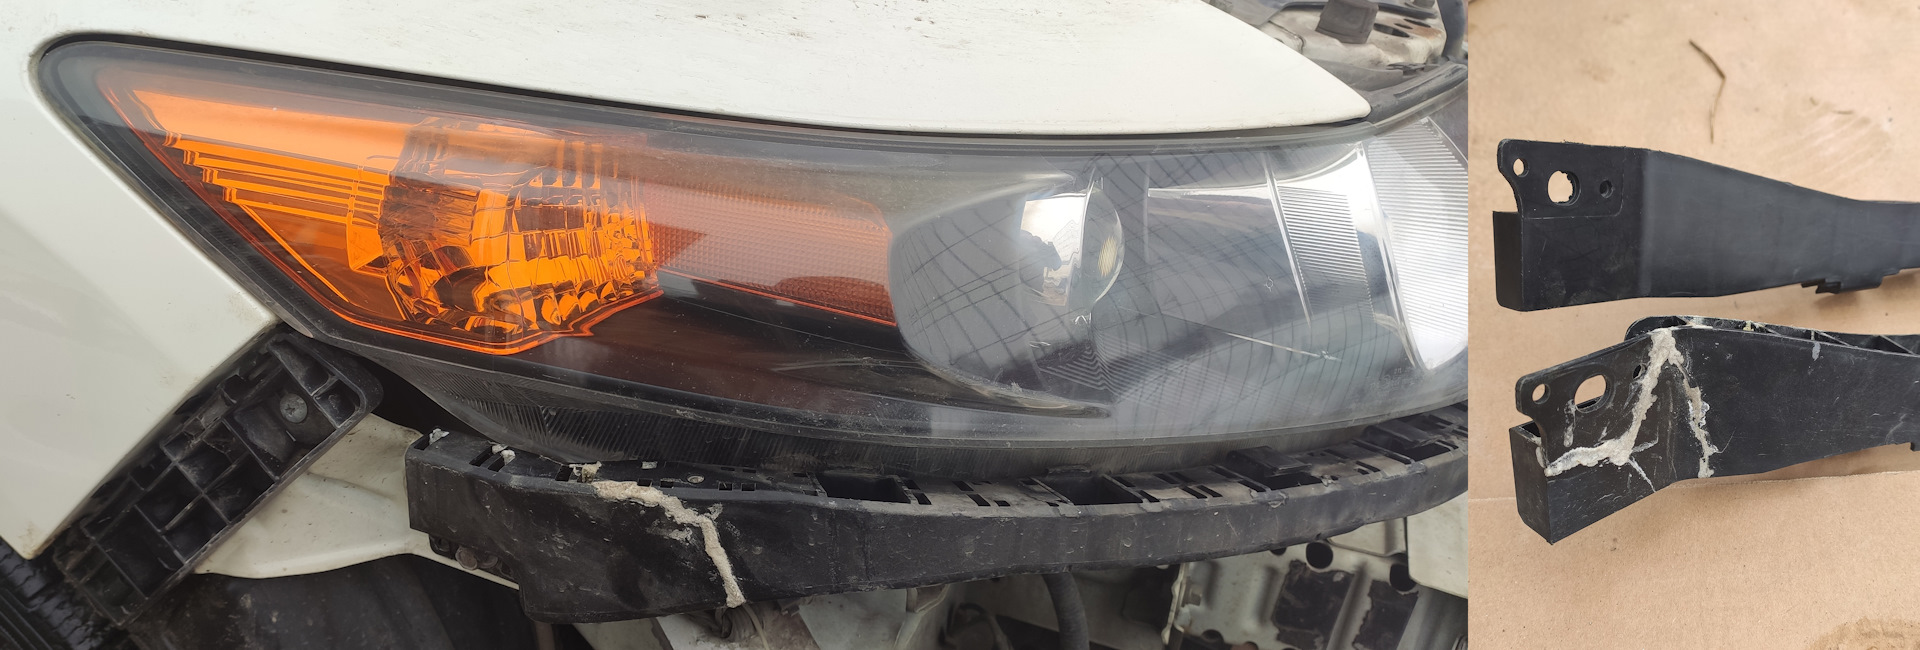
Случилась достаточно давно одна неприятность с моим бывшим автомобилем Honda Accord 8 — лопнул кронштейн фары вместе с креплением фары — там такая длинная "нога", которая ломается первой при любом воздействии, чем, впрочем, защищает от повреждений саму фару.
Получилось это довольно просто, одной летней ночью возвращался домой, и решил съехать на обочину, поросшую травой. Оттуда внезапно на меня выскочила водоразборная колонка (я гуглил, так и называется). Повезло что колонка держалась на соплях и отклонилась от наезда, но для повреждения креплений воздействия хватило.
Что делать, летом склеил пластик и вернул на место с намерением в дальнейшем кронштейны поменять. И вот время пришло, заказываем:
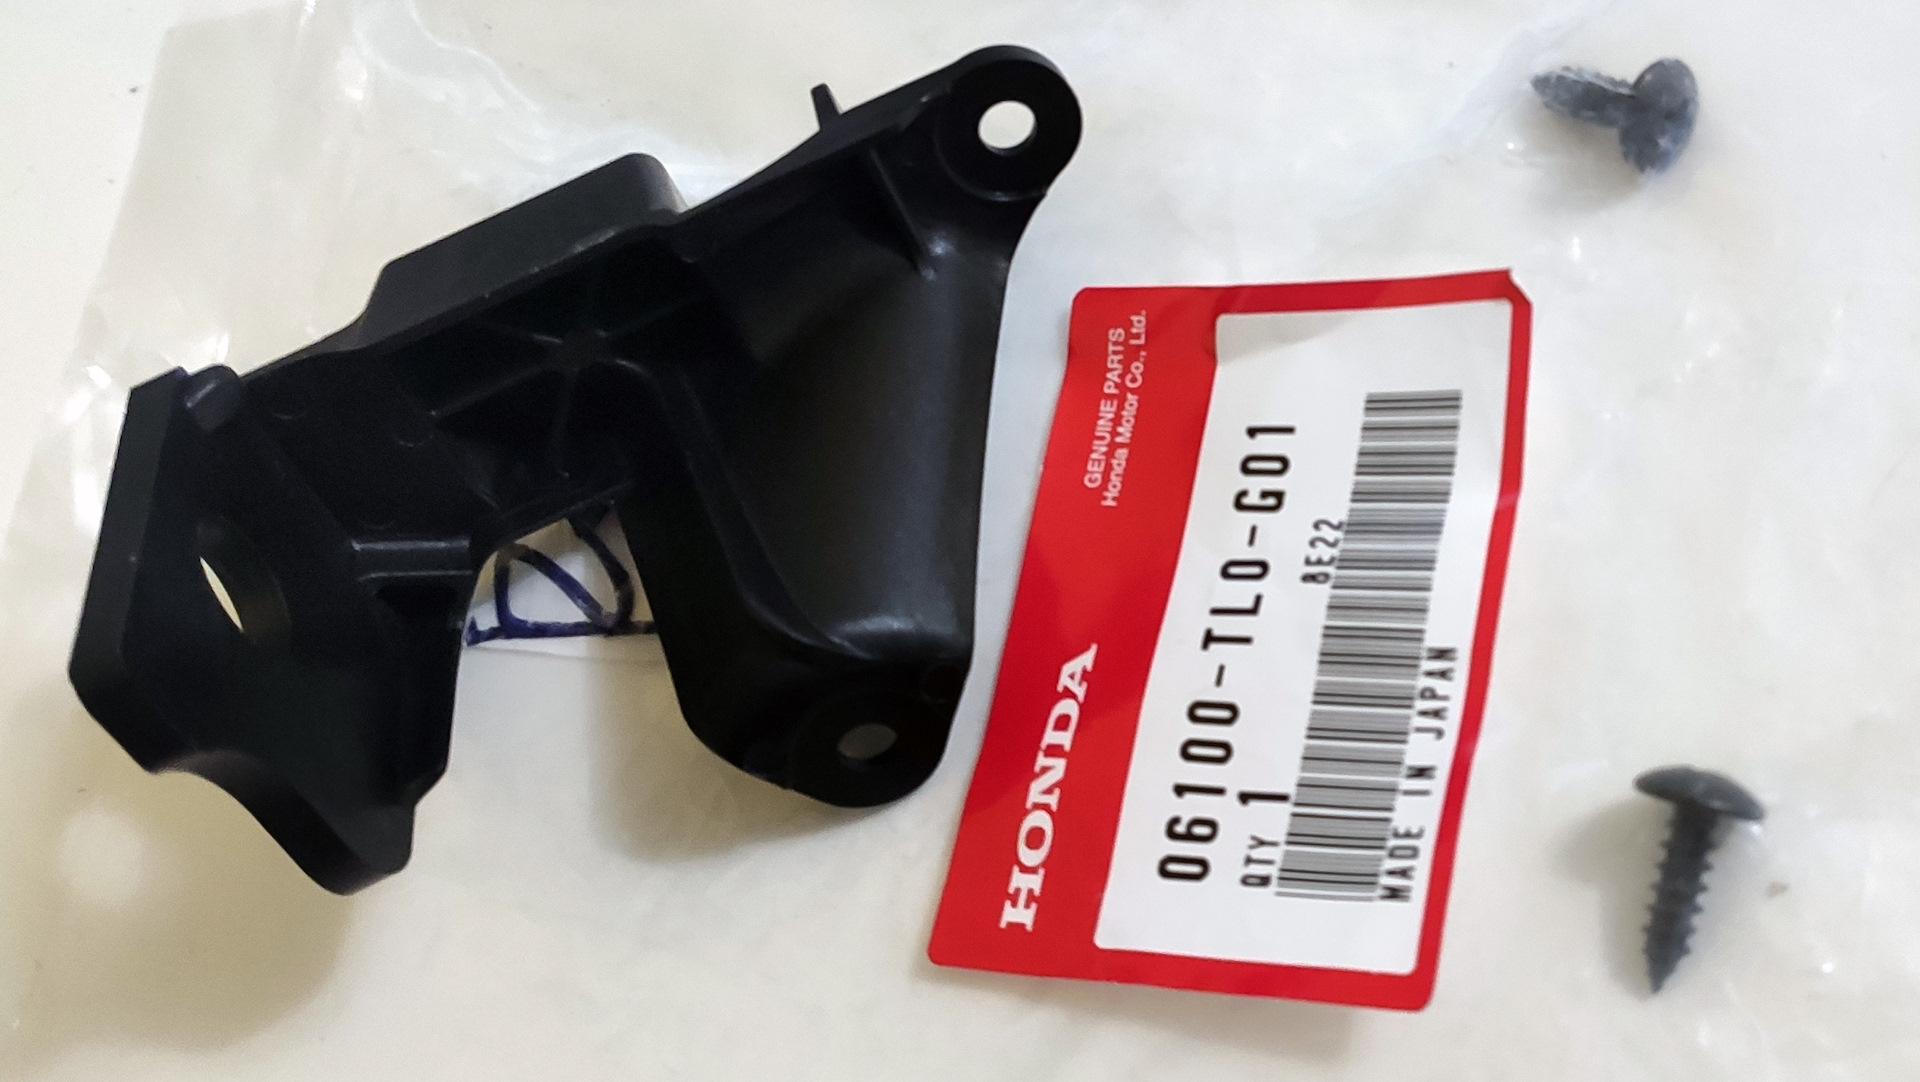
71190-TL0-G01 кронштейн переднего бампера правый ~1 000 р. 06100-TL0-G01 ремкомплект фары правый 1 810 р.
Ремкомплект это совсем не то, чем кажется по названию, стоимость за небольшой кусок пластика тоже за гранью…
Недавно писал в личном блоге о том, что у меня есть 3d-принтер, на котором печатал ограничитель двери знакомому на Hyundai Elantra.
А раз уж ремкомплект у меня в руках, да еще и по такой конской цене — решил воспроизвести деталь своими силами. Берем штангенциркуль, открываем кад (solidworks), и несколько вечеров рисуем модельку.
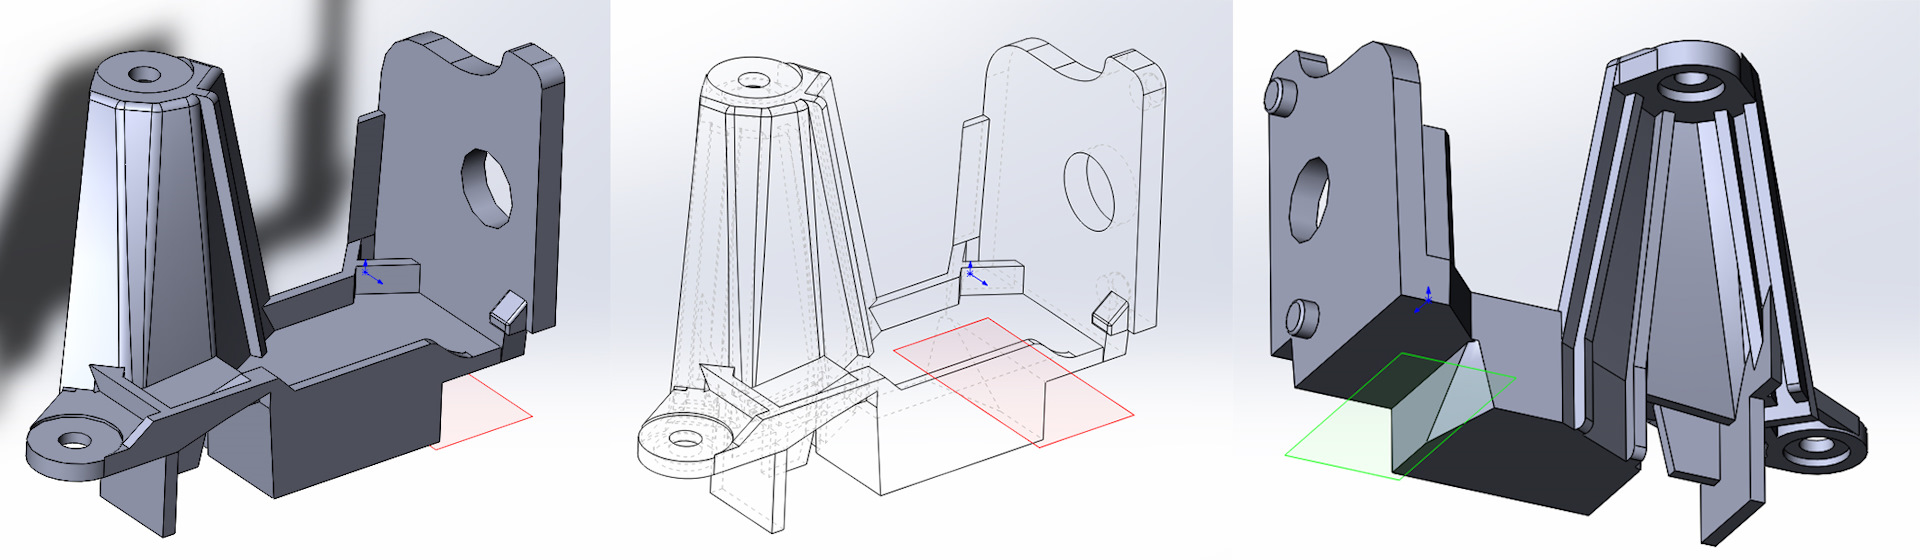 ~5 часов спустя, 3 ревизия
Вроде все ок, загоняем модель в программу для печати (слайсер), форма детали довольно сложная, без поддержек при печати не обойтись (вспомогательные "подставки", которые после печати удаляются):
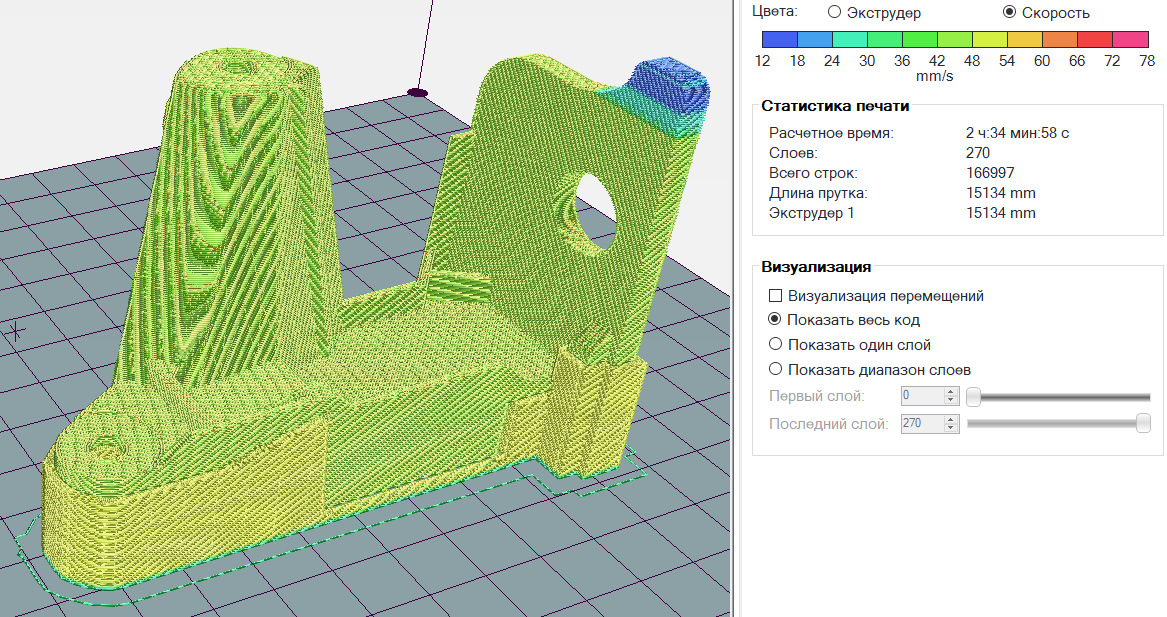 Заполнение поставил 75%, 3 часа на печать детали — это немного
Сравниваем получившиеся детали с оригиналом (аналогов не производят в принципе):

Нашлась пара недочетов — в 1 месте ошибся на 5мм, в другом с толщиной детали в месте отверстия, поэтому внес правки в модель и перепечатал.
Если вы когда-то задумывались, как китайцы копируют детали и выпускают аналоги, то примерно так это и происходит, разве что вместо 3д-печати используется обычно литье пластика, куда более массовое, быстрое, и дешевое (на больших партиях). С печатью все, идем к машине и скидываем бампер (зимой, при мокром снеге — то еще удовольствие).
 Вот так оно отъездило больше года, никаких проблем не доставляло, кроме того, что я был в курсе, также здесь видно пару отломанных защелок на кронштейне бампера
Снимаем фару, переворачиваем и смотрим на сломанную "лапу". С завода она отливается вместе с фарой, а чтобы поставить ремкомплект, нужно заводское крепление отпилить и на саморезы в штатные места прикрутить ремкомплект (саморезы 5х15мм).
Не так я представлял себе японских конструкторов, конечно, чтобы для установки ремкомплекта нужно было пилить корпус фары, но что имеем, то имеем. Спасибо и за это, некоторые производители в таком случае заставляют менять всю фару.
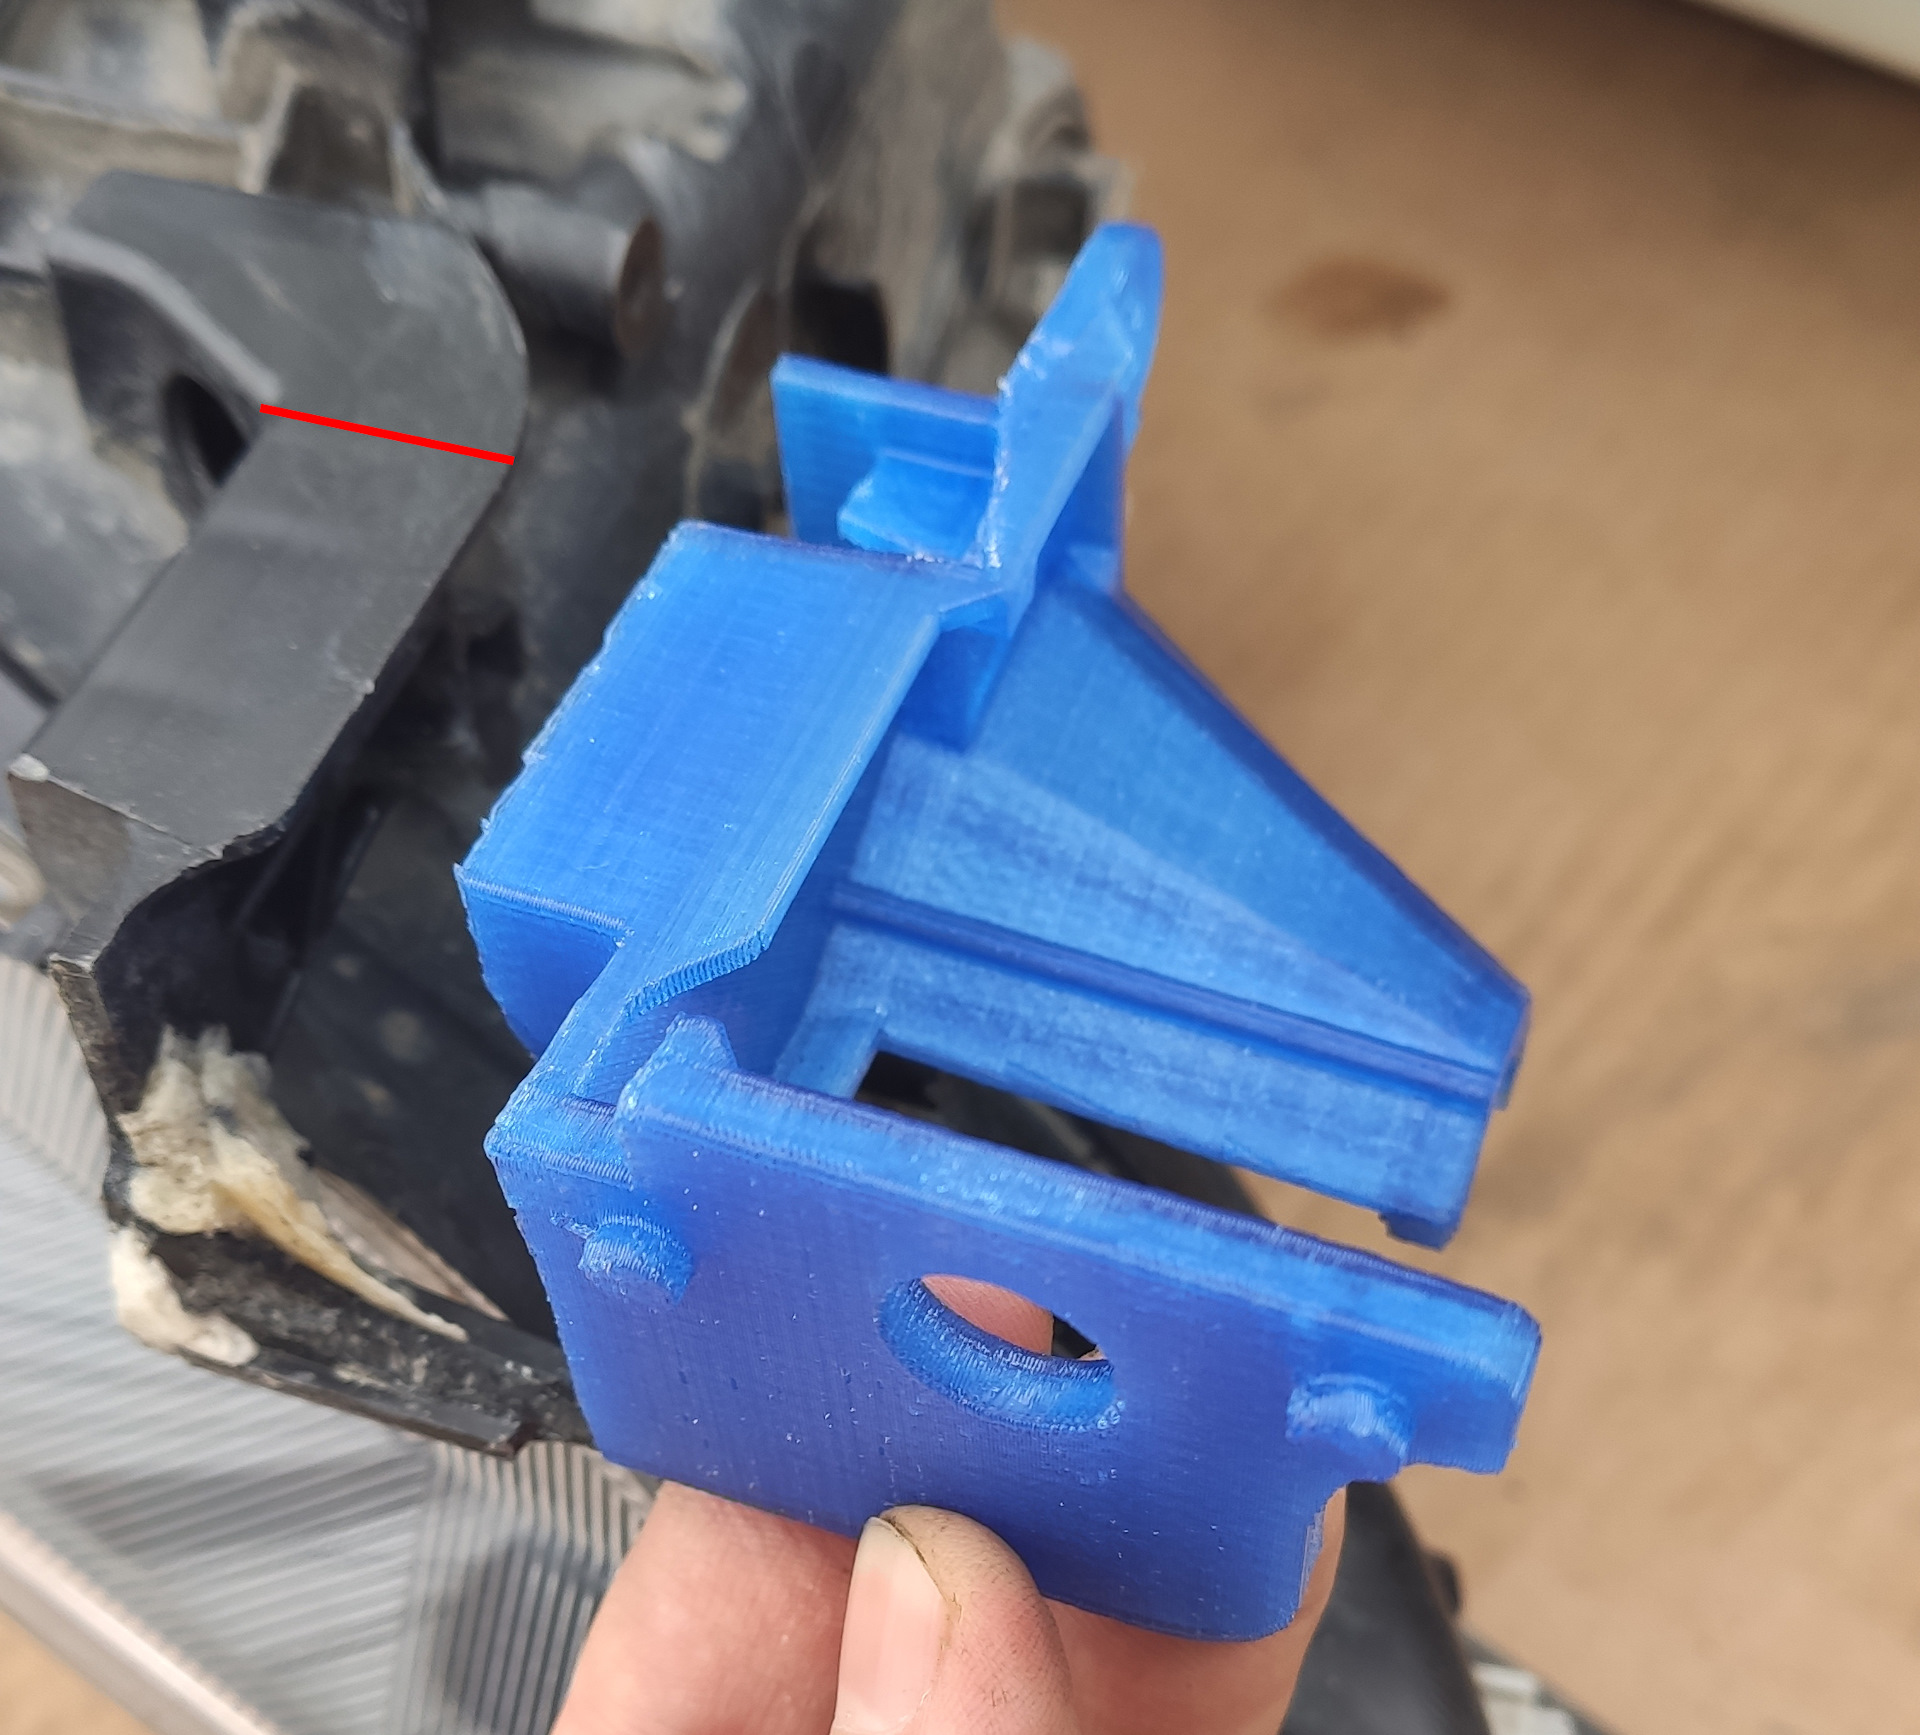 Отрезается штатная лапа примерно по красной линии
У меня получилось отрезать чуть короче, на работу это не влияет, но, в идеале нужно, чтобы старый корпус упирался в ремкомплект для большей жесткости:
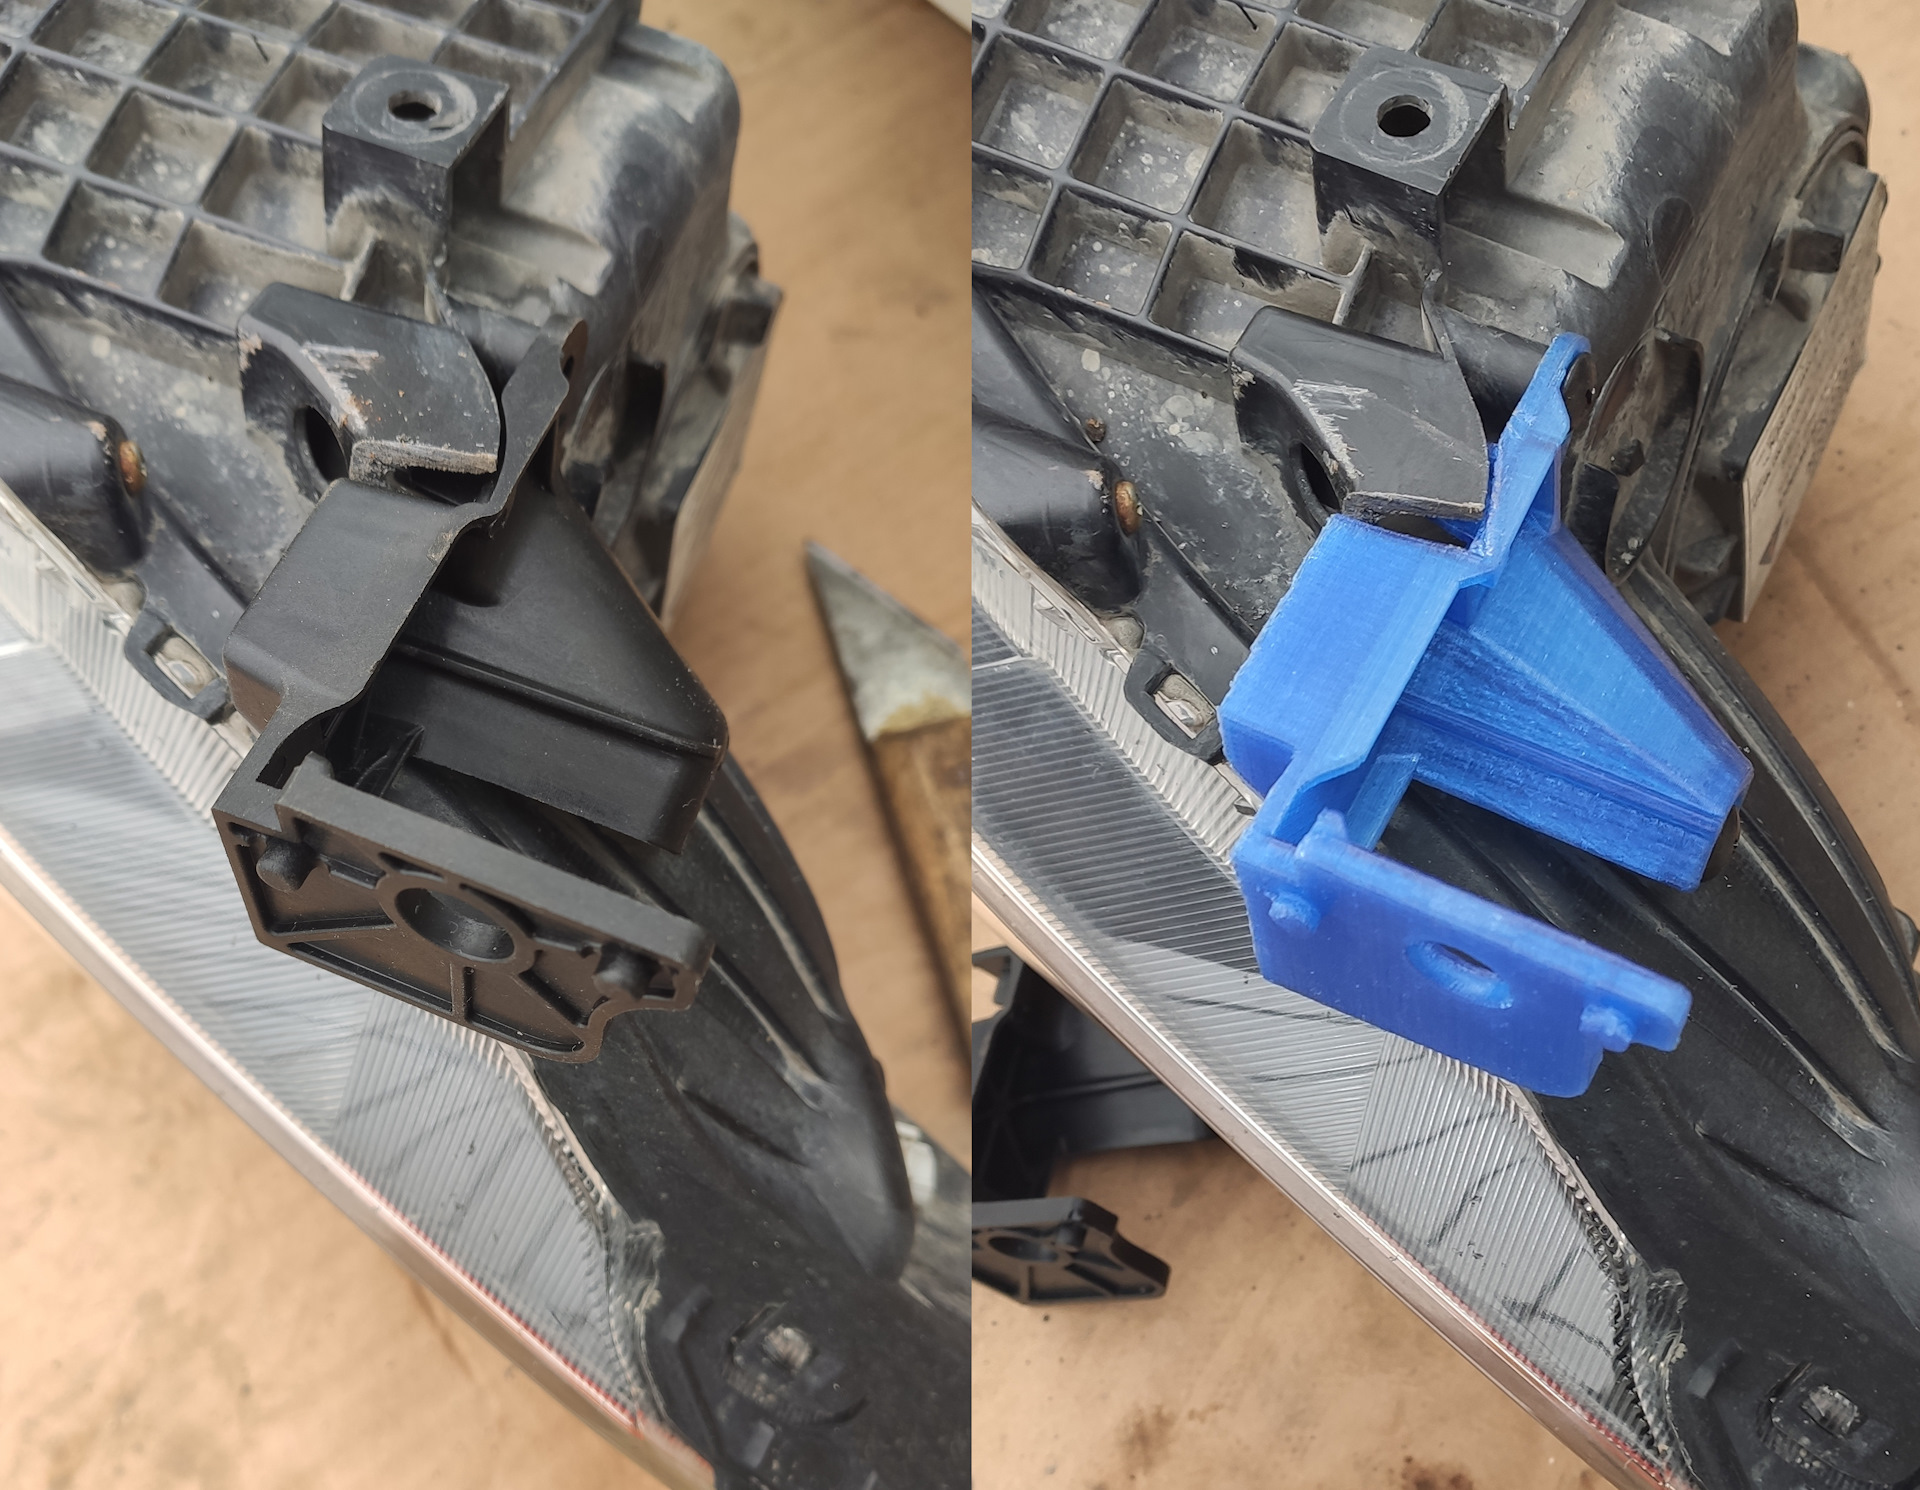 Оригинал и отпечатанная деталь — идентичны
Ставим оригинальный ремкомплект (что я, зря 2к потратил на кусок пластика?) и новый кронштейн бампера:
 Защелки бампера на месте, фара сидит крепко
Ну и для сравнения, кто угадает где было, а где стало?
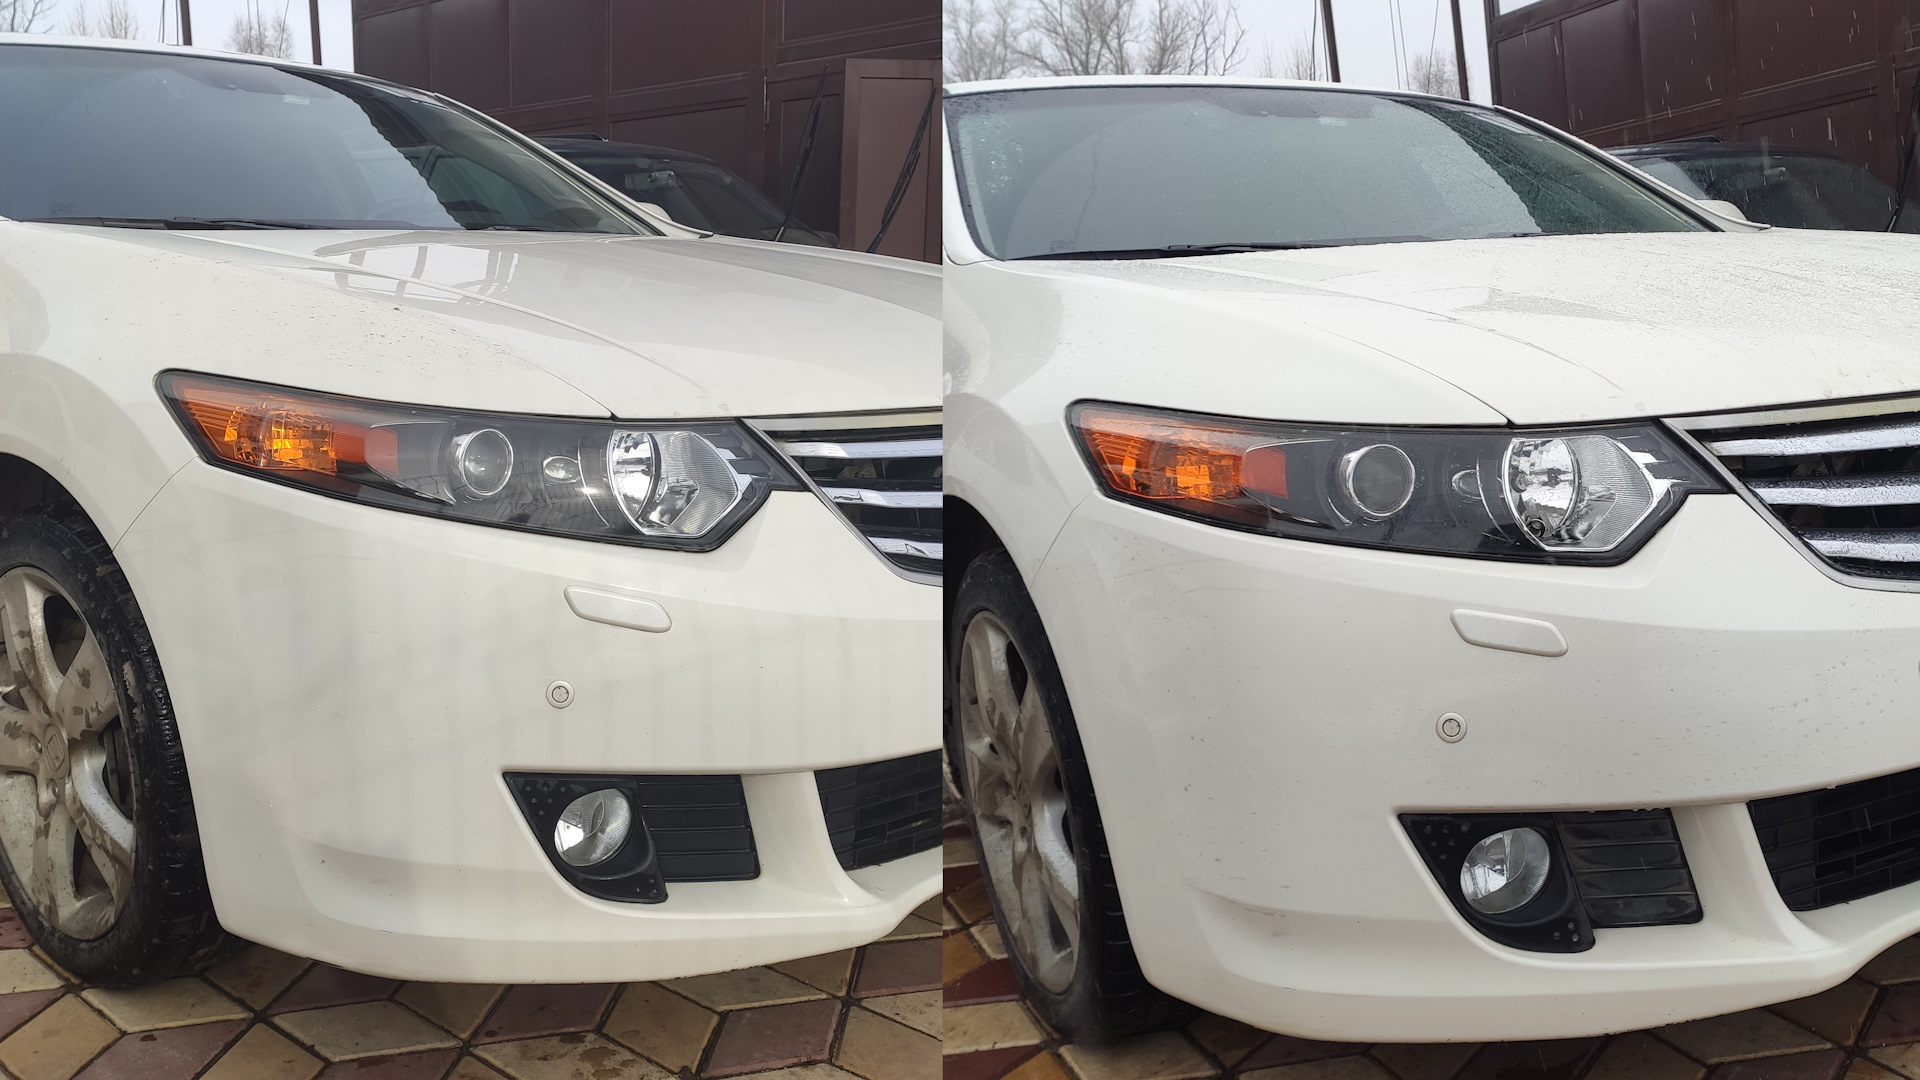 А никто, внешне ничего и не поменялось
Здесь бы задвинуть речь о том, что оригинальный кусок пластика за 2к, отпечатанный на принтере ничуть не хуже, а стоит в 6 раз дешевле и принимать заказы на деталь или продавать исходники для печати, но мне это не интересно.
Поэтому вот вам ссылка на все необходимые исходники по модели — www.thingiverse.com/thing:4181855 Ремкомплект для левой фары можно получить, просто отзеркалив модель.
Печать деталей есть думаю в любом городе, найти легко. Цены в конторах печати вроде порядка 5-10 рублей / грамм. Моя деталь получилась весом в 32 грамма (себестоимость чисто пластика в моем случае 1 рубль за грамм — килограммовая катушка стоит 1 000 рублей).
Комментариев пока нет
-

Продолжаем печать после отключения
Печать идет больше суток и в процессе пропадает свет. Знакомо? -

Как я работу в 2026 году менял + бонус
После 10 лет в e-commerce я вышел на рынок -

Goback - простые бэкапы
Решил тут наконец заняться бэкапами. И без самописных утилит не обошлось. -

Проект Наблюдатель
Проект приурочен к хеллоуину - это статуя одноглазого ктулху с механизированным… -

Универсальный AI Telegram Bot
Хотите в пару действий запустить собственного AI бота для Telegram? -

Анализ истории просмотров Youtube
Задумывались, сколько времени вы проводите за просмотром видео? Давайте считать.